In order to import and export data from Edisoft, you first need to configure the schema settings. (That specify what fields you will be importing, and their order).
To do this click on the Configure Autoload button that is on the main page.
This will show a panel allowing you to specify the autoload properties, as well as the schema settings.
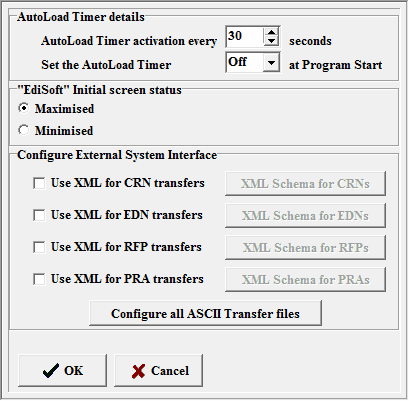
By default edisoft will use ASCII (CSV) files to import the data. If you wish to use XML click on the 'Use XML for .... transfers' tickbox. You will then need to configure the XML Schema by clicking on the relevant button to the right.
Alternatively, if you wish to use CSV you will need to configure the CSV schema files by clicking on the Configure all ASCII Transfer files button. This will bring up a new dialog as shown below:
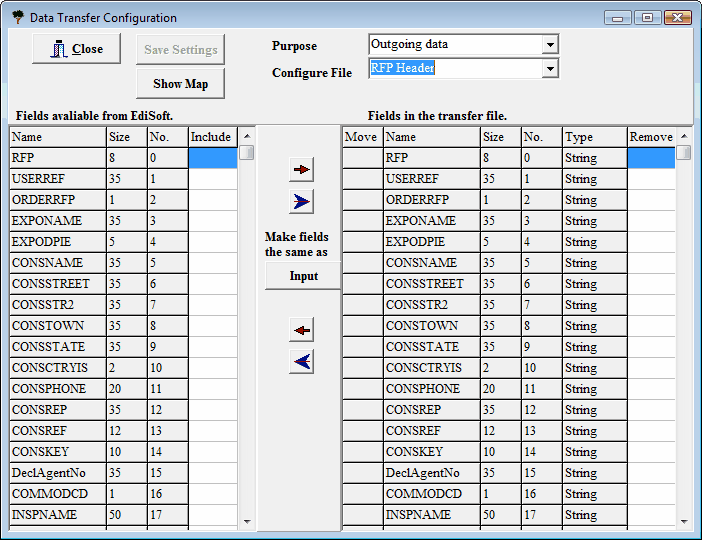
The Purpose option allows you to specify whether the configuration you are viewing is for Outgoing data or Incoming.
The Configure File option allows you to choose which file you will be working on. (eg. For RFP's you will need to configure and create multiple files including the RFP Header, RFP Line, etc)...
The fields on the left are the fields that are available for Edisoft. The fields on the Right are the fields that you have chosen to have in your transfer file. You can add and subtract which fields you will have in your CSV file by using the left and right arrow buttons.
Once done, choose another file to modify, or press the CLOSE button to finish.
The Show Map button will show you a list of files that have been configured, and those that remain to be configured. You only need to configure schema's for the section and tables that you wish to import or export data from.